
Contact Us
Have a question?

We decided to have some fun prepping some models for Warhammer: Kill Team (base game, core manual) † and we turned the process into a little tutorial for the uninitiated. For those that are initiated... who knows, you might pick up a tip or two.
To prep and assemble the models (Orks, Space Marines, Chaos Space Marines, Necron Warriors and a few Eldar †) you'll need sprue cutters, a hobby knife, gap filling super glue and spray accelerator to make the job easier.
We kept the feet of the models attached to their original sprues and glued the sprues down to temporary bases for painting. This makes painting much easier and results in clean points (when finally cut from the sprues) for mounting to LITKO clear bases.

We base-colored all of the models appropriately. We used the QND finishing method... "quick 'n dirty". We thoughtfully wanted to make other gamers feel better about their paint jobs, so we didn't bother painting all of the separate parts. More practically, this helps separate the models on a small playfield and gives it more of a board game feel. The next step was to give them some colored washes to add some shading (we're not totally heartless!).

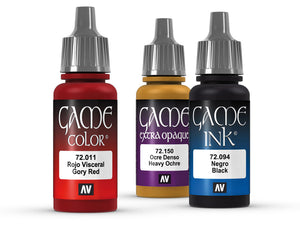
We painted the Necron models chrome silver. Our intent was the "bright" versions. Here, they've been given a wash of Army Painter: Dark Tone Ink. After washing, we quickly dabbed off the excess wash with a towel so only the deepest and finest details were picked out. Once dry, these guys were ready for their green rods and basing.

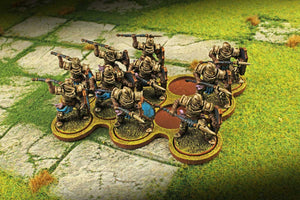
The Ork models were painted standard goblin green. They were given a wash of dark green Army Painter: Military Shader. This wash is really good for shading green without changing the original color as much as a dark wash would. Once the wash was dry, we dry brushed the models again with goblin green.

These Chaos Marines were base painted in a bright red. We gave them a heavy wash of Army Painter: Dark Tone, which deepens the red color, and blackens all the deep areas and creases. Once this was dry we did a heavy dry brush of dark red, then a brighter red, to pick out the edges and larger areas.

The Eldar troops were base painted in bright yellow. We gave them a wash of Army Painter: Flesh Wash, which is a great color for shading yellow. This gives the shadows a softer brownish-yellow tone without altering the base color like a strong tone or dark tone wash would. Once dry, we dry brushed the figures with the original yellow color, then a light dry brush of a pale yellow shade (Arid Earth), but any bone ivory color would work just as well.

A second set of Necron troops became the darker, grungier, versions. We base-colored these using Gun Metal. Once dry, we gave them a heavy wash of Dark Toke Ink. To help make these guys look a little more aged, we gave them another wash in watered down Dry Rust... just thin enough not to change the color of the surface and dry into all the cracks and crevasses of the model. Once that dried, we gave them a final dry brushing using Shining Silver.

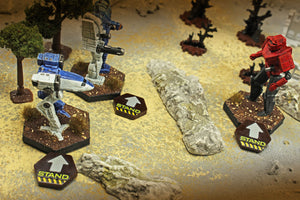
Last up were the Space Marines. These models were base colored in Ultramarine Blue. Once dry, we gave them a heavy wash of Blue Tone. The blue ink is better for shading these models than a grey or black shade because it makes the color more intense, rather than just darker. After the wash had dried, we dry brushed them with Ultramarine Blue and they were ready for basing.
Here you can see we started gluing them to LITKO clear bases. Home stretch!

You see most of the models based below on clear bases. Trim the bottom of the feet with a hobby knife to expose the plastic to ensure a strong bond. LITKO clear acrylic bases can really improve the look of your games. Allowing the terrain to show through the clear base means never having your figures look out of place... no matter the terrain you're playing on.
To glue your models to our clear bases we recommend Craftics #33 Acrylic Cement. This glue is designed for use with acrylic but bonds well with most other modeling materials such as plastic, vinyl and metal. The glue can be a little unwieldy right out of the tube, so use glue tips to keep it under control.

Finished! If you start working on something like this and have a question go ahead and post it below.... we're happy to help out!

(Pictured with LITKO Reanimation Dials.)
† As an Amazon Associate, LITKO earns from qualifying purchases.

Leave a comment